Ultimate Cyber Security Home Lab with Proxmox: Part 1 Setting up The Network

In this project, I will be showing you how to set up a home lab in Proxmox that will help you practice your hacking skills in a secure environment.
This project will consist of multiple parts. Each part will cover a different part of the lab. I assume you will have already downloaded and installed Proxmox on a server.
I have my instance installed on a Poweredge R720 with 128GB of RAM and 2 CPUs with 30 cores. You won’t need that much to follow this tutorial. I will be creating a second part of the project to add to this lab to create a SOC lab so you can attack the machines we have set up and see how to defend against them as well. If you intend to follow that lab, having a server as close to my specs will be required.
Home Lab Overview
Pfsense (Our Firewall)
Kali Linux (Attack Machine)
Active Directory (Domain Controller, Workstation-Windows10)
Damn Vulnerable Web, Boogie web app, and Webgoat (Practice web vulnerabilities )
Setting up Pfsense
Pfsenes is a gateway Router and Firewall. We will be using it to segment our lab into different subnets and keep our labs secure from any outside threats. We will need to set up pfsense first so all of our other machines will have access to the internet.
Download Pfsense
To keep from signing up for an account I have found an ISO image we can download. Click the link below to download the pfsense ISO.
https://archive.org/download/pfSense-CE-2.6.0-RELEASE-amd64/pfSense-CE-2.6.0-RELEASE-amd64.iso
Setting Up Open Switch and Linux Bridge
Before we start setting up Pfsense we need to set up our switch and add another adapter to our network so we can have a WAN and LAN….

To start we will need to ssh into our Proxmox and run two commands.
apt updateapt install openvswitch-switchOnce this is complete we can set up our two bridges and VLANs. Let’s start with the Linux bridge we will use for our Lan.

Click the name of your Proxmox server on the left, then system, network, and create. Click Linux Bridge.

Give your bridge a name and the IPv4/CIDR you would like to use. If you don’t know much about this then stick with what I have. Click create.
Now let’s create our OVS bridge for our switch.
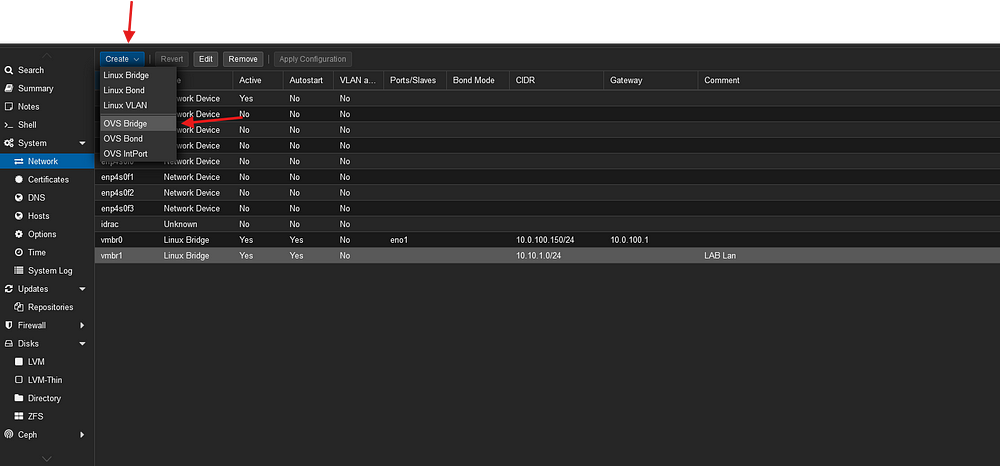
We can get to this the same way. Make sure to click OVS Bridge instead of Linux this time.
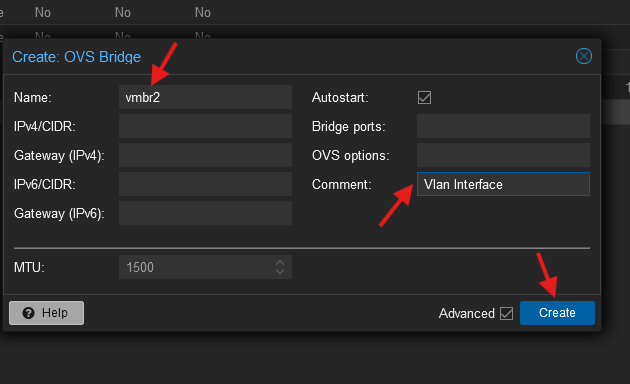
Give it a name and leave a little comment so we know what it is. Click Create and we will move on to create our Vlans.

Here we will be using IntPort to create our VLANs. Click Create OVS IntPort.

We will be creating 3 Vlans. vlan10, vlan20, and vlan30 we will be doing it this way so we can separate all of our labs into different subnets. Add the name, the OVS Bridge should already be populated add 10 to the VLAN Tag, and click create. Do the same for vlan20, and vlan30.

It should look like this at the end.

Click Apply Configuration and were done. Now let’s setup our pfsense VM.
Psense Configuration

Click Create VM on the top right.

I will be leaving the VM ID as 100 because this is our Firewall. I will also be using lab-Vmname as a naming convention throughout the labs so we can keep everything organized.
Click next…

Click storage and pick where you downloaded your pfsense ISO then
Click next…
Click next on system.

You can add more disk space if you want to, The more disk space you have the more VMs you can add.
Click Next…

You can leave your cores at 1 if you would like to. I like adding one more core.
Click Next…
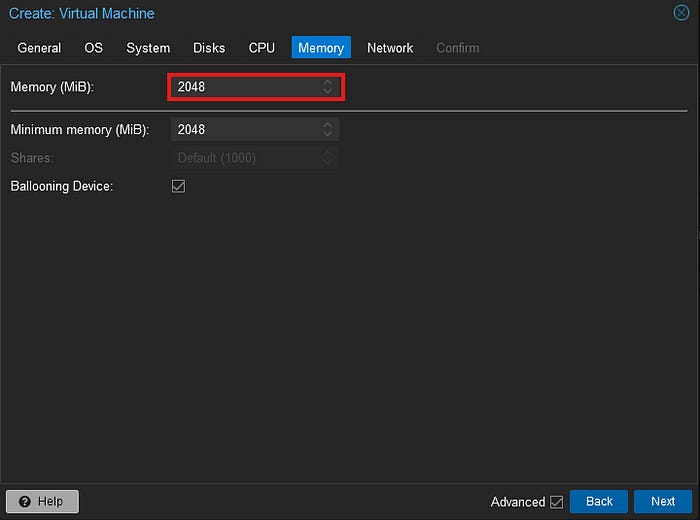
You can leave your memory at 2GB.
Click Next ..

Leave your Bridge on the default. We will be adding the second bridge here soon.
Click Next…
and Finish.
Now let’s add the second Network adapter to our machine.
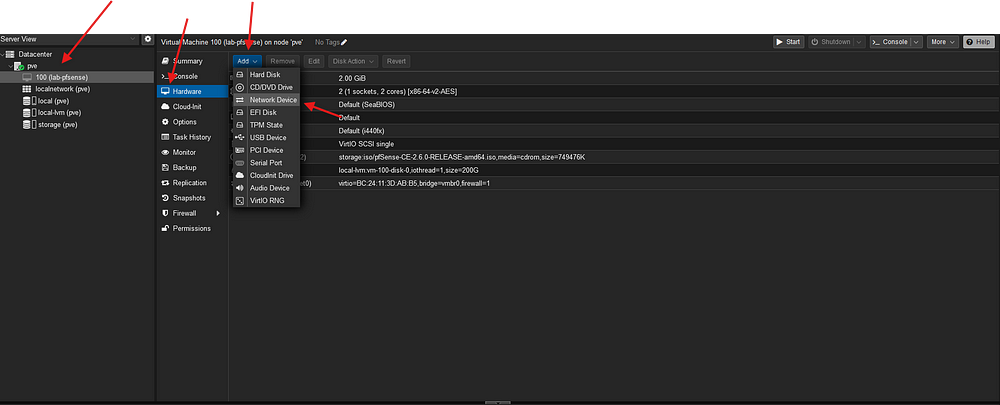
Give your VM a minute to finish, once you see the name you can click on it. Click Hardware, Add, and Network device.

Now choose the Linux bridge we created earlier and click add. Make sure not to choose the OVS Bridge.
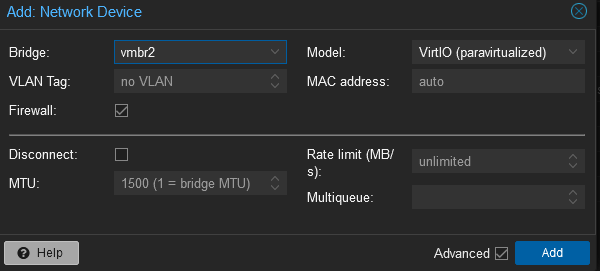
We will also need to add the OVS bride we created so our switch will have a way to reach our VLANs.
Now let’s start up our VM and set up Pfsense…

Click on your VM in the menu on the left… Click console and you can either click the big start button or the small one on the top right.
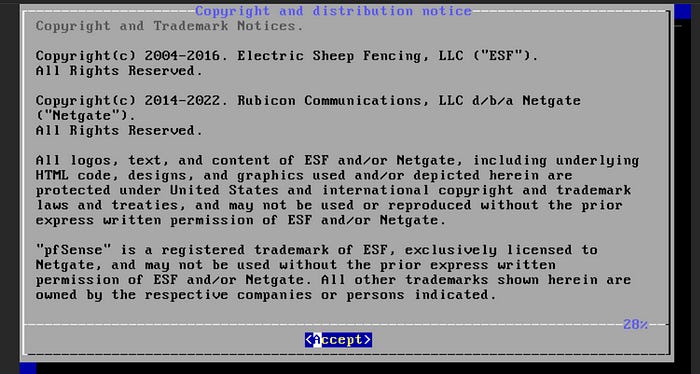
Once you start up your machine it will take a minute then you should see this pop-up… Click accept.
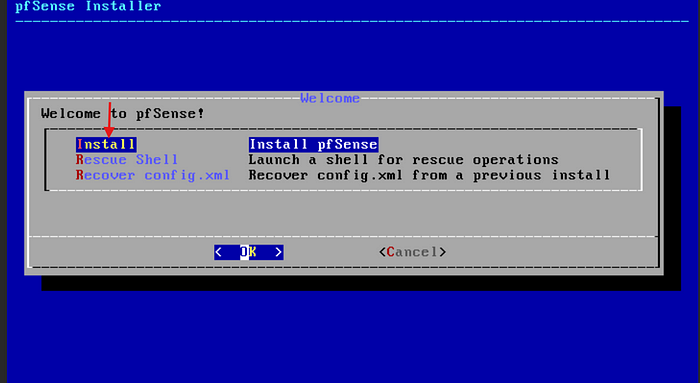
We will be using the default on everything during this installation.
Click OK…

Change to the language you need or leave as default.
Hit Enter…
Hit enter…

Hit enter…

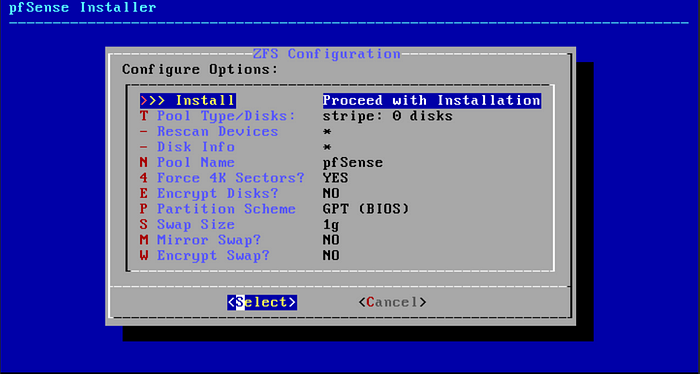
This start won’t be there. Hit your space bar then hit enter.

Hit yes… I know it looks scary, It’s just making sure there is nothing on the disk we created for the installation. There isn’t Hit enter

On this Page, you want to hit no. It will start the installation.
When the installation completes you will be prompted with….
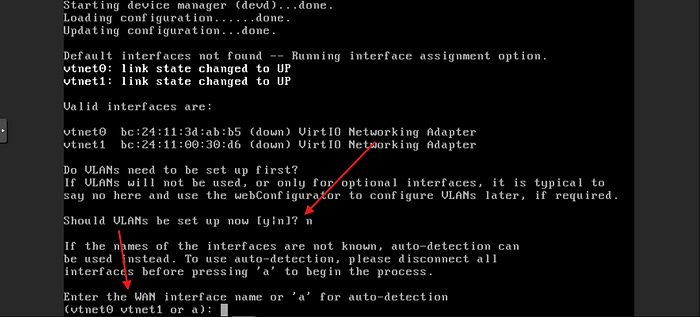
Should VLANs be set up now [y, n]? type n and hit enter.
If you see two interfaces you are in good shape. If you do not you will need to go back remove the vr and add the second one in. Hopefully, you don’t have to do this.

Type in vtnet0 for your WAN interface and hit enter.

Add vtnet 1 for the LAN interface and hit enter.

It will show you your decisions. Type y and hit enter.
Now we are done with the installation. Let’s setup our LAN and we will be finished with the configuration.

I have blocked my WAN address out but yours should be showing. We will be setting up the LAN next.

Type 2 and hit enter.

Type 2 again to configure the Lan
Hit enter…

Follow the arrow and enter the information. Make sure to Just hit ENTER on the ones where the arrow is pointed at enter. It will ask you if you want to convert to HTTP I would stick with HTTPS.
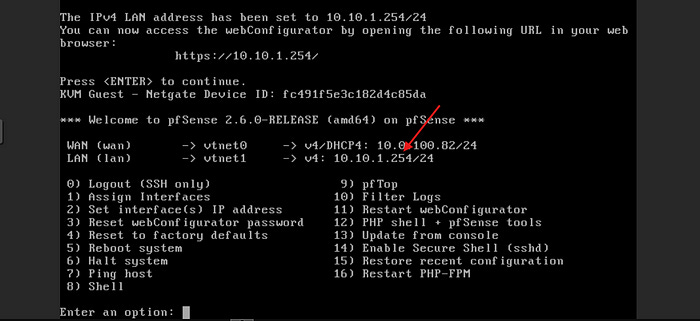
Now we’re finished!!!!
In the next part of our project, we will set up Kali Linux and finish configuring our Pfsnese. If you like this project hit follow and finish the project with me. If you find anything you think I can improve on, Leave me a comment.
See you in the next Part!!!!
If you Like what your reading, consider signing up for my paid newsletter where we builds labs weekly.